Introduction
We are gathered here today to talk about font rendering with OpenGL.
The Font File
- Why BDF?
- BDF run-down
- BDF parser run-down
- API font data model
Generating a Mesh
- Why are we making this big batched mesh?
- Mesh generation steps (handle spaces, new line, glyph positioning, etc)
- Image of generated mesh (no texture)
Now that we have metrics for each of the font’s glyphs loaded we can go ahead and create the mesh we’re going to use to display the text.

The Texture Atlas
- Why do we need a texture atlas?
- Texture atlas packing algorithm
- Glyph rasterization
- Image of Texture atlas texture (red)
If we want to texture our mesh quads with the image of the corrosponding glyph then we first need to have those glyph images at hand in the form of textures we can send to the graphics device. Since we generally want to change the OpenGL state as few times as possible and since we want to complete our text rendering using as few draw calls as possible we’re going to take the time to generate a single texture containing all of the glyph textures within it. This technique is called texture atlasing, where a single contiguous texture can be used to draw many textures simply by providing a sub-region of the texture to draw from. The price we’re paying for these savings is memory as later on we will have to provide the information about the texture sub-region we want to draw via the mesh vertex buffer.
Generating this texture atlas is going to be non-trivial. I actually thought about writing a seperate article altogether about this but decided against it. Instead I will include it as part of this article for completeness sake. Before we get in to the details here is a rough overview:
- Sort all of the glyphs in order of largest to smallest based on their width and height.
- Place each glyph somewhere in the texture atlas so that it isn’t overlapping with any other glyphs that have already been placed.
- Once all glyphs have been placed we rasterize each one in its place.
- Store each glyphs texture coordinates in a map that can be index by the glyph character code.
Textured Mesh
- OpenGL texture R-RGB swizzling
- Image of Texture atlas texture (white)
- Add UVs to vertex data
- Add sampler uniform to fragment shader
- Show image of textured text!
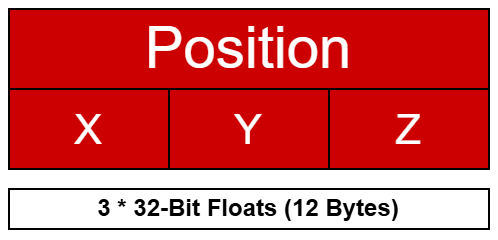
In order to use our texture with the meshes we generate it needs to contain texture coordinates within its vertex data.

Addendum: Colours!
- Add colors to vertex data
- Add color to vertex + fragment shader
Let’s make it possible to change the colour of our text! As with most things in graphics programming there are many ways to go about this. One method that might come to mind is
by using a GLSL uniform vec4 to specify the colour we want to give our final pixel. Another method would be to include the colour information within our mesh’s vertex data. Both of these options are fine, but for this example we’re going to go with the latter. One added benefit of using the vertex buffer to store our text colour is the ability to have a unique colour for each character quad within the mesh. Of course, the downside is that our mesh vertex data now includes four extra 32-bit floats (Red, Green, Blue, Transparency) for every vertex and so if you’re limited by memory this may not be the best option.
Our vertex buffer layout will now look something like this:

We also need to modify our shaders so that the shader program accepts our new colour attribute and passes it in to our fragment stage: